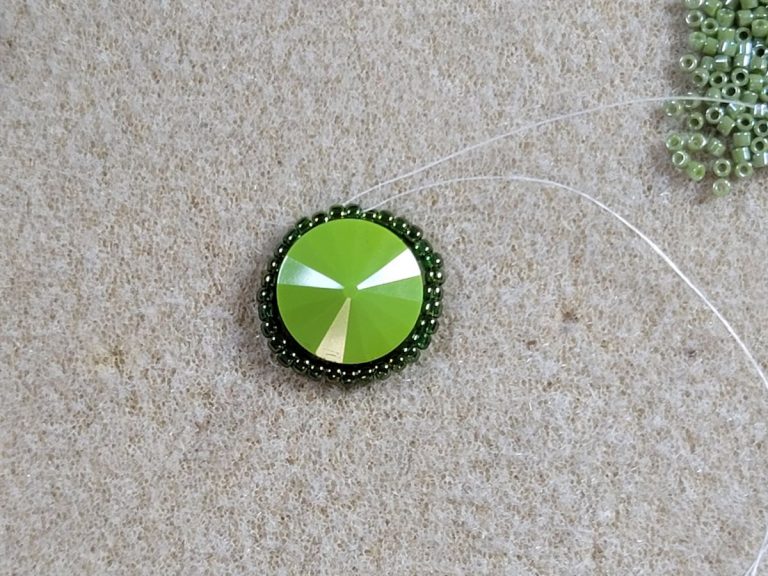
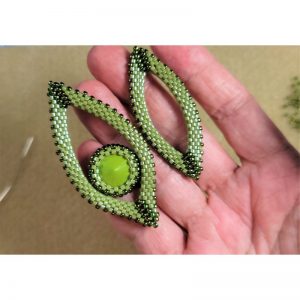
Although we have covered the peyote bezel in previous tutorials, I wanted to do a brief walkthrough for this gorgeous 14mm Wasabi Rivoli from Preciosa.
This bezeled stone is going to be the centerpoint of the large Marquis component in the last tutorial.
The trick to a creating a great bezel it to get the initial bead count correct so that the rivoli fits securely into the seat without being loose (too big) or forced into an off center position (too small).
Since this component is going into a component, I used the same color scheme choice for the beads used to make the bezel.
The links above are my affiliate links. If you choose to purchase the materials using these links, I make a small commission that helps support my website and YouTube Channel.
The Technique
Remember in peyote stitch technique, that the beads you pick up initially will constitute the beads for Rows 1 and 2.
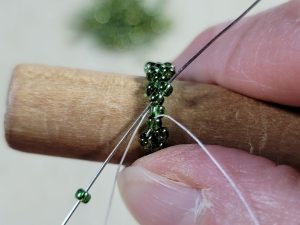
I began by picking up 32 of the Toho round seed beads.
Pass through all the beads a second time to form the loop.
Sew through a few more beads to close the loop.
Alternatively you can tie two overhand knots before moving through the beads to close the loop.
Slide the loop around your mandrel to help keep your bead work in the proper shape.
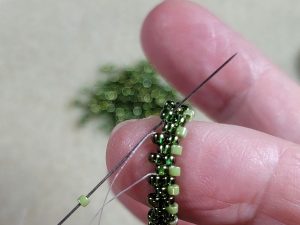
From here peyote stitch Row 3 using the 11/0 Toho beads.
Try to keep the newly added beads on the same side as your dominant hand. I am left handed, so all the new beads land to the left of the bead I skip over.
As I add the last bead to the row, I also step up through the bead on the opposite side of the bead work.
As you can see here I am sewing through the center line bead and the bead to the right, on a diagonal line.
For the remainder of the rows we will alternate back and forth from one side of the bead work to the other This helps to for a uniform seat for the Rivoli.
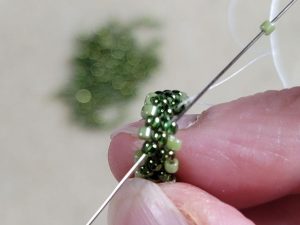
Stitch Row 4 using Delica beads.
Notice that I slid the loop off the mandrel to make it easier for me to stitch on the right side of the bead work.
As I add the last bead to the row, I also cross the center, sewing on the diagonal again.
As you can see here I am sewing through three beads.
Stitch the next row using Delica beads.
Notice that I flip the bead work around to make sewing the beads easier.
As I add the last bead to the row, I also cross the center, sewing on the diagonal again.
As you can see here I am sewing through three beads.
Step up into the Delica bead. Stitch another row using Delica beads.
Notice that I flip the bead work around to make sewing the beads easier.
Step up into the new bead after finishing the round.
Insert the Rivoli.
Reinforce by sewing through all the beads on the new row.
If you prefer not to show any tiny exposed thread you will have to sew through the upper and lower Delicas as you work around the bezel.
As you work position the beads to lay flat against the stone.
Sew on the diagonal back across the center until you are exiting a Delica bead on the opposite side.
Add the last row of Delica beads and follow the same steps to reinforce and secure the stone.
Step up into the new bead after finishing the round.
Insert the Rivoli.
Reinforce by sewing through all the beads on the new row.
At this point you have two options:
Weave off the thread.
Tie half hitch knots and end the thread.
In the next post, we will learn how to use beads and this bezel to embellish our marquis components.
So stay tuned for the next post. Don’t forget to subscribe to my YouTube Channel and sign up for my newsletter.