It is essential to set up a Safe and clutter free workspace. Layout the the tools you need for your project and move any items that can catch fire away.
Have your Fire Extinguisher nearby and know how to use it.
Wear safety goggles when cutting wire and using a torch.
Place the Solder Board or Ceramic Tile in the center of your space.
Place your quenching bowl and Pickle Pots on the same side as your dominant hand.
Keep the torch on the opposite side. (You do not want to reach over your hot torch to quench or pickle your metals.)
Fill your Torch before you start the project and remove the fuel can from your work area.
The Technique
The technique for making your own Balled Head Pins is fairly simple but it does take a little practice.
To get the best results, you will want to follow the steps closely. The wires need to be cut quite a bit longer than necessary, just in case the ball drops off and you need to start over.
Don’t get discouraged if this happens, it happens to everyone from time to time.
Before you apply the torch to the wire, you really want the end to be as flush as possible. This helps the Ball to form nice and round.
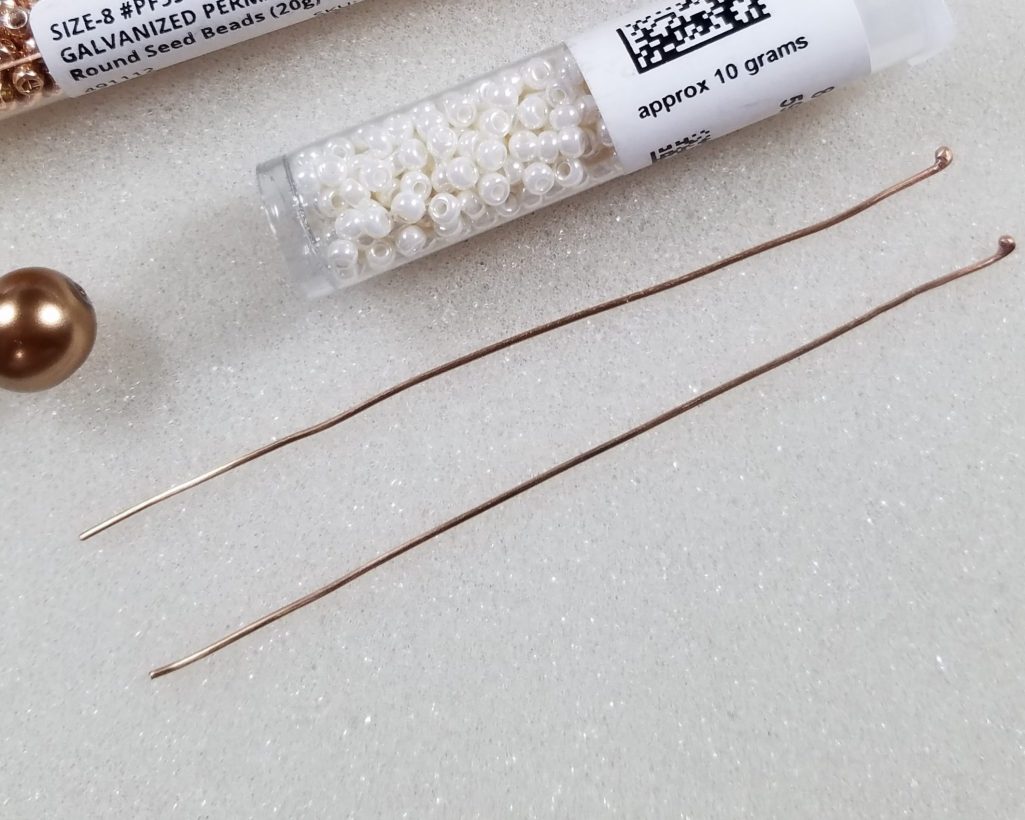
Cut two 4 inch lengths of the Bronze wire so that each end is flush.
Use the file to make the ends nice and flat.
(The remaining wire will be used to make the jump rings in Part 3)
Cross locking tweezers with Fiber handles work great for this type of project.
The cross locking action hold the wire for you, so you can focus on what is happening with the torch instead of holding onto the wire.
The fiber or wood protects your hand from the hot metal of the tweezers.
Pick up the wire with the cross locking tweezers close to one end.
Turn the tweezers so the wire faces straight down toward the work surface.
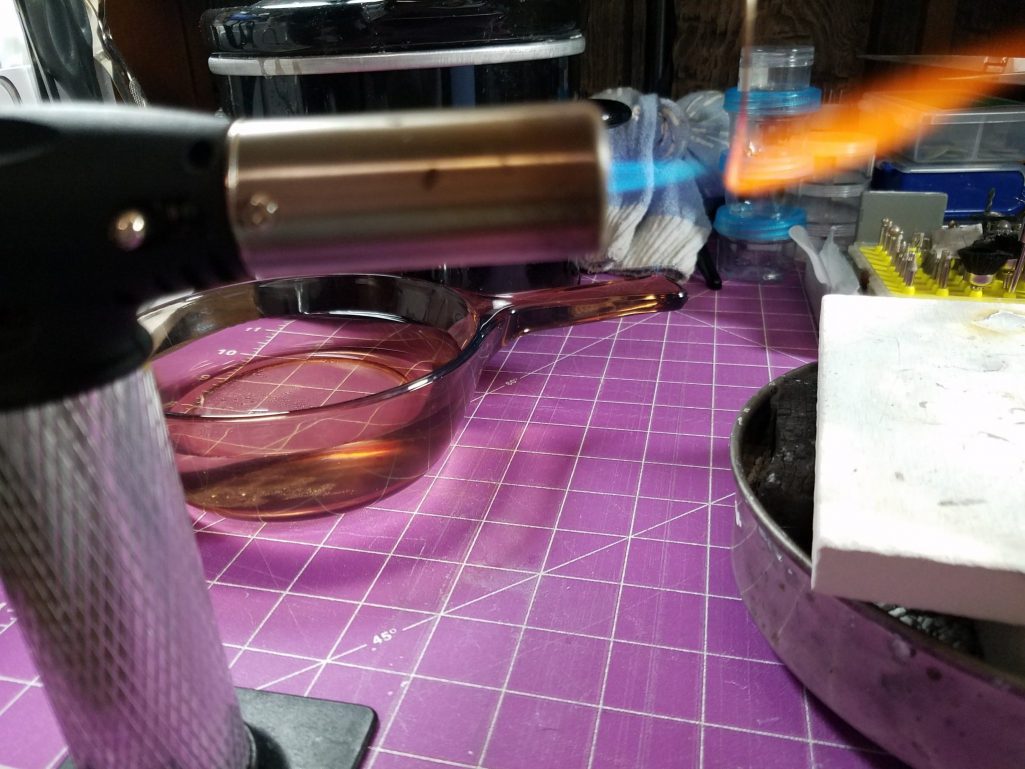
You want to use the hottest part of the flame when using your torch for this technique.
When you look at the torch flame, you will see the bright blue inner cone. The outermost tip of that cone is the hottest part of the flame.
Lay the tweezers and wire on the side of the work area of your dominant hand.
Light your torch and lock.
Adjust the flame.
Hold the torch stead against the work surface with your non-dominant hand with the flame facing the dominant and over the Solder Board surface.
Pick up the tweezers and position the long end of the wire in front of the tip of the cone.
Be patient until the wire begins to slowly melt and form a ball.
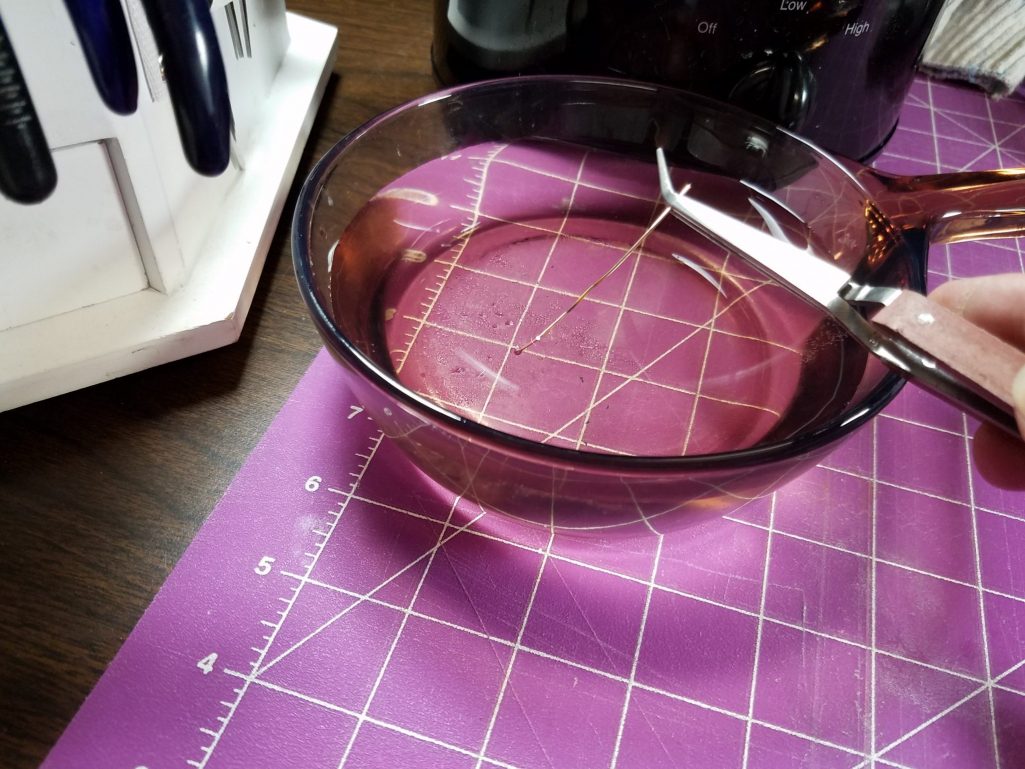
As soon as the ball is the size you want, remove the wire from the flame and quench.
Note that I left the torch in the stand.
Quench your Tweezers so you do not get a burn and repeat the steps above for the second wire.
Using Copper Tongs only, place the wires in our pickle pot to remove any firescale. Remove the wires after a few minutes.
Now we are ready to finish and polish the wires before forming the findings.
Finishing and Polishing
The head pins do not require very much finishing. The residual firescale and any tool marks can easily be removed with the sandpaper.
If you have any deeper tool marks you may need to use your file first to diminish them.
You can get a very smooth finish to the shaft of the head pin by folding the sandpaper into a rounded shape.
Drag the Head Pin in one direction only. Rotate the head pin a quarter turn every 3 or 4 strokes and repeat until you are satisfied.
Next work on the ball of the head pin. Rotate the sandpaper in a circular motion working all the way around and on the top of the ball.
The area under the ball can be finished by folding the sandpaper to a sharper edge and working upwards and over the ball. Work in quarter turns on this too.
The pro polish pads work fantastically at polishing wire. The mild abrasive can achieve a beautiful shine to the wire.
The polishing can be done with the flex shaft but it is pretty cumbersome and mishaps can occur very easily.
To Polish the Head Pins:
Cut a 1/4 inch strip of a pro polish pad.
Fold it around the shaft of the head pin and work up and down, rotating the pin in quarter turns until you are satisfied.
Use your fingernail to get into the space beneath the ball and work all the way around.
Don’t forget to the ball, use the circular motion and work all the way around and the top of the ball.
If you need to straighten your head pins after you have finished and polished them, use a cloth or nylon jaw pliers to perform this task.
You don’t want to run the risk of scratching or marring them with tool marks.
In Part 3 of the Bronzed Bridal Earrings Series, we will form the Ear Wires from the Balled Head Pins.
We will make matching Jump Rings with the remaining wire.
Then we will put all the components together and complete the gorgeous earrings.
Add your info to the forms below to Subscribe to my Newsletter and to receive email notifications when the next post is published.


")